

Veo 3 lets you generate high-definition videos with native audio (dialogue, ambient sounds, music), giving you a production edge over rivals. You should know it can still fail when your prompts stray beyond training data, so expect iterations and some manual fixes. Access is limited to the U.S. via Flow and requires an AI Ultra plan ($250/month), but if you invest the workflow can produce impressively lifelike clips for ads, scenes, and prototypes.
Unveiling Veo 3: Features that Redefine Video Creation
Veo 3 pushes boundaries with native audio output—synchronized dialogue, ambient effects, and background music baked into HD clips—something Runway and Sora still lack. You can iterate rapidly (I reached ~90% in about a minute, with final tweaks taking longer), stitch shots using Scene Builder, and export design assets via Whisk/Imagen 4. Access is limited to Flow in the U.S. on the AI Ultra plan ($250/month, ~ $272 with tax), so factor cost and region into your testing plan.
Core Capabilities and Innovations
Veo 3’s core is multi-modal generation: text or image prompts produce video plus baked-in audio, while Scene Builder helps maintain character consistency across multiple shots through timeline-based “Add to scene” and “Jump to” workflows. You’ll get controllable ambience (ceiling-speaker music, mechanical hum), HD outputs, and quick logo exports via Whisk/Imagen 4. Expect fast first drafts—often around five iterations to refine blocking—and some failure modes when prompts wander outside training data, so validate details during review.
User Interface and Experience Dynamics
Flow’s UI centers the timeline and shot controls: you add a shot, hit the plus sign, then pick a cut workflow like “Jump to” to preserve continuity. You adjust audio layers, camera hold length, and blocking inside Scene Builder; I ran about five iterations and finished with ~15 minutes of light edits in DaVinci Resolve. Watch for auto-captions and unexpected gestures that can appear without prompting—always scrub generated clips before final export.
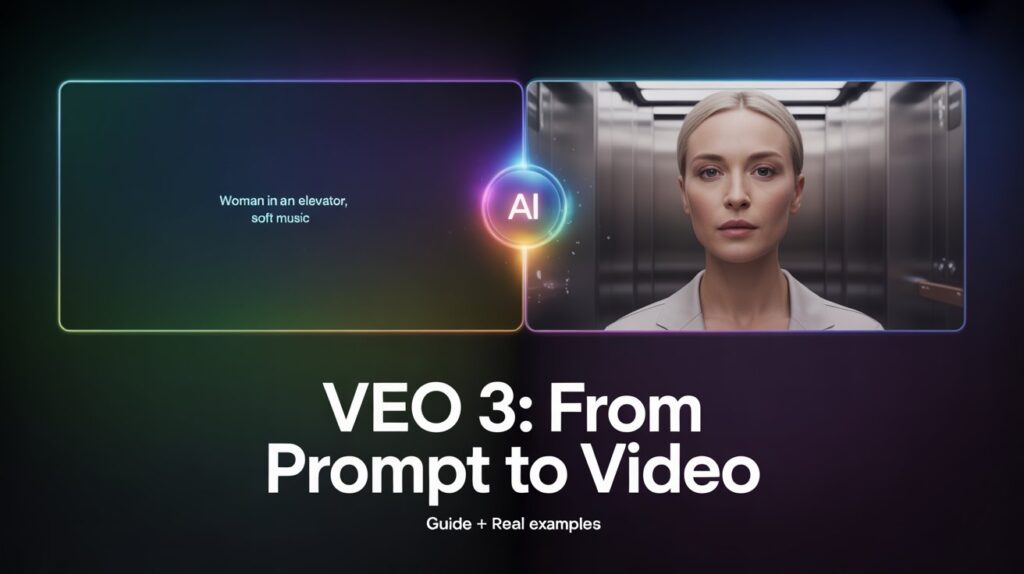
When you build shots, precise prompt constraints matter: instructing Veo 3 that surrounding passengers “look at phones” instead of “watch” fixed attention errors, and adding “do not touch face” removed unwanted gestures. Use Scene Builder’s Add to scene → Jump to flow to retain appearance across cuts, but expect occasional drift—I needed five revisions to stop a recurring miscue. For audio, include explicit cues like “soft elevator music” and “mechanical hum” so the model bakes those elements into the native soundtrack rather than leaving the room sonically dead.
Crafting Compelling Advertisements with Veo 3
Use Veo 3’s native audio to produce synchronized dialogue, ambient cues, and music so your ad feels finished straight out of the generator; in my Mintro test that saved time but required about five iterations and ~15 minutes of DaVinci Resolve touch-ups. Watch for model errors—Veo 3 can add hallucinated captions or awkward gestures that reverse your message—and note access is via Flow on the AI Ultra plan ($250/month).
Strategic Approaches to Ad Design
Give the model explicit blocking, negative instructions (e.g., “no captions,” “no nose touch”), and ambient sound cues to control focus; prefer a single continuous, eye-level shot for intimacy and aim for a 6–15 second runtime for social platforms. Use Scene Builder to maintain character continuity across cuts, iterate ~3–7 times to get tone right, then reserve a short edit pass (10–20 minutes) to polish fades, mix levels, and add a final logo generated via Whisk or Gemini.
Real-World Examples of Successful Campaigns
My Mintro one-shot is a practical example: initial output looked promising but needed tweaks—surrounding passengers were watching, a woman touched her nose, and captions appeared; after 5 iterations and 15 minutes of editor work the ad landed. The two-shot micro-narrative (the baby-shoes concept) used the Scene Builder to keep the woman’s face and outfit consistent across shots, proving Veo 3 can handle short, emotionally resonant sequences.
In hands-on testing you’ll find small changes flip results: removing an implied smell gesture or adding soft elevator music changed tone instantly. Expect the rule of thumb I found useful—about one minute to reach 90% and up to one hour for the last 10%—but most social ads need only a brief 10–20 minute polish if you lock blocking and sound in your prompts first. Veo 3 is US-only via Flow at $250/month, so plan test runs accordingly.
Seamless Multi-Shot Scenes: Ensuring Consistency
You’ll preserve continuity by copying camera framing, lighting notes, and the exact character description from your first-shot prompt into every follow-up; add explicit phrases like “same person, same outfit, same hair” to reduce drift, and reuse the original ambient audio cues so sound anchors the edit. Expect to get ~90% there in the first minute but plan for manual fixes—the last 10% often needs a short pass in DaVinci Resolve to align pacing, color, and audio.
Techniques for Character Continuity
Repeat the original character paragraph verbatim across shots and include a reference image when possible; lock camera angle (e.g., eye-level medium-wide), specify identical clothing and age range, and ban new gestures with lines like “no touching face, no recoil.” You’ll reduce identity drift by enforcing consistent lighting descriptions, matching facial expressions, and iterating only on small variables—I typically needed five passes to nail subtle behavior.
Tools for Scene Integration and Flow
Use Flow’s Scene Builder timeline and the “Add to scene” → “Jump to” workflow to order shots and create clean cuts, reuse Veo 3’s native audio prompts for matching ambience, and export drafts for quick trims in DaVinci Resolve; brand assets from Whisk/Imagen 4 drop in cleanly so logos don’t break continuity. Maintaining one timeline and consistent audio cues prevents jarring edits.
In practice, export low-res drafts (720p) from Flow to iterate fast, then import into DaVinci Resolve for final polish: apply a single LUT or color-match node between shots to keep skin tones uniform, use 0.3–0.6s audio crossfades, and sample 2–3 seconds of room tone to fill gaps. Normalize dialogue to around -16 to -14 LUFS for platforms, and spend roughly 15 minutes on color, audio leveling, and a final logo drop from Whisk. If automated continuity still breaks, manual face-matching and subtle retiming are safer than regenerating new shots.
Harnessing Modular Control: Ingredients to Video Creation
You can treat Veo 3’s Ingredients like a parts bin — swap visuals, dialogue, ambient stems, and motion cues to iterate rapidly. By isolating elements you change only what matters, you often reach a usable draft in about one minute for 90% of the result, then spend longer polishing the last 10%. Using Flow with an AI Ultra plan ($250/month) gives you access to these modular tools inside the Scene Builder for faster, repeatable swaps.
Customization Through Modular Elements
Pick an Ingredient (background, character pose, voice, or ambient track) and iterate that single element while keeping others fixed to maintain continuity. For example, swapping elevator music from “none” to a soft 15‑second loop fixed a dead soundscape in my Mintro ad without altering blocking. Watch out for character drift when you change facial seeds or poses — lock facial seeds and outfits if you need strict continuity across multiple shots.
Building Dynamic Narratives with Ingredients
Layer Ingredients to shape pacing and emotional beats: use one audio stem for ambience, a separate dialogue ingredient for delivery, and a visual ingredient for camera move; stitch them in Scene Builder using Jump to or Crossfade. In my two‑shot micro‑story I used five iterations and ~15 minutes of edit time in DaVinci Resolve to align audio cues and timing, proving modular swaps speed story adjustments while preserving tone.
For deeper control, organize Ingredients into three buckets: Visual (frame, lighting, costume), Audio (dialogue take, SFX, music stems), and Timing (shot length, cut point, camera motion). Anchor a primary visual seed for character consistency, then change one audio stem at a time and run 2–3 quick renders to confirm interactions. This workflow minimizes unwanted artifacts — positive: faster convergence to intended tone; dangerous: unseen mismatches if you swap multiple ingredients at once without locking seeds or reviewing waveform alignment.
Transitioning from Frames to Engaging Video
Shift your focus from static frames to temporal flow by thinking in beats: setup, pivot, payoff. Use the Scene Builder to chain shots and preserve continuity; my Mintro ad needed about five iterations and ~15 minutes of manual edits in DaVinci Resolve to fix pacing and audio. Leverage Veo 3’s native audio to stitch ambient sound and dialogue, and plan for the familiar AI tradeoff: one minute to get 90%, an hour to chase the last 10%.
The Art of Frame Sequencing
Arrange frames to guide your audience’s attention: open with a wide or medium-wide establishing shot, then cut to tighter close-ups for emotional beats. The elevator spot relied on a single, continuous, eye-level shot to hold tension while the baby-shoes scene used a steady medium-wide to reveal an object. Time cuts to audio cues—aim for 2–4 second beats for dialogue and longer holds for silence or ambience.
Best Practices for Cohesive Storytelling
Keep character continuity by locking your character’s face, outfit, and camera angle across shots in the Scene Builder. Strip unintended gestures and on-screen text that change meaning (the early elevator draft had a nose-touch that undermined the ad). Use subtle sound bridges—soft elevator music or a fridge hum—to tie edits together, iterate 3–5 times, then polish in an editor; Veo 3 gives you powerful native audio, but manual passes still matter.
Match lighting, color temperature, and eyeline between shots—mismatched warm vs. cool lighting is the fastest giveaway of an AI stitch. Apply 0.5–1s crossfades or J-cuts on audio to smooth transitions and keep reaction shots under ~2 seconds to maintain pace. When continuity fails, duplicate a reference frame in the Scene Builder to force facial and wardrobe consistency, then use small manual tweaks (color grade, ambient fades) to sell the join.
Navigating Veo 3: Best Practices for Optimal Use
Common Pitfalls and How to Avoid Them
Expect to iterate: you’ll often hit ~90% fidelity in a minute but spend up to an hour nailing the last 10%—that’s where prompt iteration and manual cut-ins matter. Mis-specified prompts produce unwanted captions, broken character consistency, or odd audio layers despite Veo 3’s native audio; access limits (U.S. only via Flow) and the AI Ultra plan ($250/mo) also shape feasible workflows.
- prompt iteration: start specific, then relax constraints.
- character consistency: use the Scene Builder and reference frames.
- captions: disable auto-captions unless you proof them.
- Any automated audio or captioning can introduce errors—proof and edit locally.
Expert Tips for Enhanced Video Production
Lock framing and eye-lines: set a fixed, eye‑level camera and state “characters never look into camera” to preserve continuity across shots. Use Scene Builder for multi-shot scenes, leverage native audio prompts for ambient cues, and plan to finish the last 10% in DaVinci Resolve—I typically spend ~15 minutes polishing one-shot ads. Integrate logos from Whisk to avoid redraws.
Refine prompts with concrete sensory details: specify ambient tracks (e.g., “soft elevator music, 60–70 BPM”), exact blocking (“no hand-to-face gestures”), and camera behavior (continuous one-shot, 24fps). Run 3–5 quick iterations focusing first on composition, then on audio sync and finally on micro-expressions; that ordering cuts iteration time and reduces odd model hallucinations.
- Scene Builder: use Jump To for clean cuts between rooms.
- audio baking: include sound descriptors and volume cues in the prompt.
- manual polish: plan a 10–15 minute Resolve pass for fades and mix.
- Any final tweak that feels impossible in Veo 3 can usually be solved in a short manual edit.
Summing up
So Veo 3 shows that you can generate high-quality, audio-integrated videos quickly, offering realistic dialogue, ambient sound, and solid character continuity for ads and short scenes; you should expect to iterate and perform light manual edits, access is limited to Flow in the U.S. on the AI Ultra plan, and for your rapid prototyping and polished short-form work it represents a meaningful step forward.
Author
MUZAMMIL IJAZ
Founder
Muzammil Ijaz is a Full Stack Website Developer, WordPress Specialist, and SEO Expert with years of experience building high-performance websites, plugins, and digital solutions. As the creator of tools like MagicWP and custom WordPress plugins, he helps businesses grow online through web development, SEO, and performance optimization.